Showing posts with label NewEyeCandy. Show all posts

Friday, December 14, 2012

Tis’ The Season Dylusions My Reason…

Howdy Candies…Just stamping by with a quicky post today.  I’ve been whipping up some inspirational goodness in the Studio as of late & most of what I’m working on are gifts, cards, & dare I say “I’m Ornamental” at the moment!  I’ve seen so many inspirational Holiday heARTistry lately that I’m trying to keep up with a personal list of idears, LoL (Lots of Love!).  I reckon you must be too? 

So I tried my hand at my own very first configurations by Tim Holtz & mixed it up with a bitty of Dylusions of course!  Who would of thunk it…’Festive Berries’, ‘Fresh Lime’, & ‘Cut Grass’ along with some ‘Red Pepper’ (acrylic paint) would be such Delicious Eye Candy!?!  I mean honestly when I was playing around with this of course it is still “UNDER CONFINGERATIONS CONSTRUCTION” but that’s because we’ve had a little side-track this past week in the Studio.  Take a Looky Loo:  (To leave a comment, thoughts, suggestions, or feedback - just click the title to this post & scroll to the bottom)

Tim Holtz Configurations “UNDER CONSTRUCTION”: (I can’t wait until it’s completed!)

Configurations Under Construction

I know right…I have seen a few but never thought to myself that we can make moving parts!  That was my Darling Husbands idear…how smart is he, eh?  Whilst I shared on my last post the hilarious video of Dyan sharing how to make these amazing paper Ornament Stars from her Dylusions Art Journal paper in under 5 minutes, I also had to laugh a bitty because in true candy style I’m so not a quicky creator by any means. 

It was two inspirational dear Friends of mine that offered a bitty of journaling insight as I’m just doing this off a whim that lent a hand in going over the quicky mark.  Thank you so much Mz. Donna & Mz. Sue for your input!  I used liquid pearls, sprays, Glaze Pens (I’m in love with these) – & my opaque pen.  Did you know???  That there is a little trick in using the inkssentials opaque pens!  I doubt that it is a discovery but anywho…I found that after you doodle or write it seems not so bright…however, if you go over it again very lightly it writes almost like paint!  LURV IT.  So here is a gander of my un-ribboned pile of Stars to finish off:

Tis’ The Season as Dylusions is My Reason:

CU Dylusions Star Ornaments

Dylusions Star Ornaments

These are just splendidly FUN to do!  My Darling Husband got into the spirit & did a couple & added the smaller ones to a dowel (He wanted me to put one on my Configurations)  I’m sorry Loveee but I have other ideas for those.  HUGS xx  I’m quite sure that our little Gurl will love these as gifts to her class too.  You truly can make these with your Children, Grand-Children, Nieces, Nephews, Neighbors…& they have tons of possibilities. 

I’ve also done a few surprise mini cards for some special gals that I will be seeing at Creative University 2013!  I sooo can’t wait to get them finished & mailed off for a bit of Christmas Love!  Thanks to Heidi Swap for her generosity of her 12 Days of Printable Christmas Freebies.  *NOTE: I did purchase her Adjectives Digital Brushes to add a bit of flair…though I can’t share them now, watch for it!  Here is a sneak peak & NO they surely are not the way they appear Tee-Hee!:

Heidi Swapp – Christmas Ornament Free Printable! (Click the Photo To Go To Her Post!)

Sneak Peak CU Twinspirational Gift

So without Further Ado…We have some Blog Candy to Give-Away from our post on “One BRAVE Evening…” & Let’s give a warm Congrats too:

December 2012 Candy Winner - Christine

Drum Roll….The WINNER IS: Christine!!! Congrats Christine, please submit your information so we can get your “Wear Your Words” & “Twinchie Ornaments” out to you.

As always it is deeply appreciated that you have followed along with me in this creative journey!  There are more things on my plate as of late & it is no surprise that from now until February you will see a lot more posts regarding my Journey to Creative University 2013!  I’m a wittle sad that this is going to be our very last year but I’m super excited that it’s going to be most SPECIAL!  There is still time for you to join in the all the fun.  Just visit Mz. Fabulously Artsy herself for more information.  CREATIVE UNIVERSITY 2013! Along our journey we got to have a LIVE online class with Tresa for the Holidays!  I’m sooo excited to share what I did too.  Thanks for Stamping By…:  (To leave a comment, thoughts, suggestions, or feedback - just click the title to this post & scroll to the bottom)

Creative University Live Project November Create-N-Take!: (Click the Photo To View More Info!)

CU 2013 November Create-n-Take

Saturday, April 21, 2012

Compendium of Curiosities Vol. 2 - 2

Howdy Candies…I’m stamping by to share my CC2C Challenge from Tim Holtz amazing book of different techniques “Compendium of Curiosities Vol. 2”.  This challenge is a weekly challenge hosted by an amazing Ranger U Educator Linda L. via www.StudioL3.blogspot.com .  I was so tickled about this weeks challenge that I just could not wait to dabble into it.  I’m obsessed with Tim’s amazing ideo-logy line of trinkets & small parts, well there are some amazing little treasures that I’m learning to do more with & I’m loving every moment of it.  I’ve always wondered how in the world to color metals…not being very versed in working with metal bases I’m just pleased as peaches in how this came out.  I was completely inspired by both Linda & Angie (Guest Sponsor & Ah-Mazing Artist for this weeks challenge!) that I wanted to do a combination of the two.  Of course I was so nervous to ruin any finding I have (they are so precious to me…I keep reminding myself ‘Nichole don’t hoard it, create with it) that I wanted to make something smaller just to make sure if my experimenting turned out differently.  I also have Tim in my head saying “Embrace Your Imperfections”.  So I was inspired to create a special tag to go hand-in-hand with my finished pieces from yesterday; BSU Boise State due Tree of Life pendants for my new online Etsy store. Since each piece is always unique for both tag creations & the Tree of Life pendants I thought it would be a treat to share all the photos with you.  (I see you smiling…) (To leave a comment, thoughts, suggestions, or feedback - just click the title to this post & scroll to the bottom)

Close-Up Technique 2: Faux Patina

A Compendium of Curiosities, Vol.  2, page 58 (Click the Photo to purchase Tim’s Autographed copy today!)

CC2C2FauxPatina

Special Handmade Gift With Duo Pendant Purchase & CC2C – Technique 2 Challenge Submission: (Click the photo to participate in the CC2 – Challenge today!)

CC2C2Tag

Of course I can’t tell you how fun it was to just be able to sit back & ‘catchup’ on some “Nikita”, “Law & Order Special Victim’s Unit”, “Hawaii 5-O”, & “Scandal”…yes “Scandal” is a close second to “Revenge” for me as far as being just a couple of my top favorite shows.  I had so much FUN & I also got to watch a snippet of Kellen Moore here in Boise doing Autographs…so of course my first duo pendant would be inspired by my love for our hometown football team BSU Boise State University colors.  These are hand-crafted from genuine sworvski crystals (amber & sapphire birthstone gems & pearls), silver, & artistic non-tarnish silver wire.  I’m so excited that I was able to create a way to package them with today’s challenge that I’m so giddy right now.  I’m still learning to take better photos & truly appreciate all of the feedback from them so far.  Thank you all for your support on my new endeavor in finally opening my own Etsy store…so without further ado pics of my first duo:

Close-Up View of my wrapping…(Click the button on my right side-bar to view my Etsy Store):

BSUPendant

The Duo with a quarter in-between to illustrate the size for my customers:

BSUDuoPendant

The Large Pendant:

BSULargerPendant

The Small Pendant:

BSUSmallPendant

I’m truly excited to be able to share both of these stories of my artistic journey.  I have a confession to make to my readers.  I don’t know how to time manage very well & I need to get better at regular posting.  Sometimes when you go a couple of days or a week (at the most) without seeing from my Studio or journey’s in life it is because I grapple with time management.  I promise you one thing…I always visit back & make time for each of you.  I’m deeply humbled by your words, encouragement, thoughts, feedback, & most importantly the gift of your heART’s too!  It means the world to me more than I could ever put into words.  So thank you very very very much for Stamping By…

Monday, April 9, 2012

Where In The World Is My Vagabond?

Wow oh Wow!!! So I just got my brand spanking NEW Vagabond today & I can not wait to delve right into it.  I think the Easter Bunny loves me Winking smile…in fact I think this is truly better than chocolates…diamonds…(oops didn’t realize Easter Bunny left diamonds eh?) Well suffice to say I have yet to have a chance to open up my Vagabond as I want to take it on a journey to our Capital steps!  What I do have is a pixie to share as my Crickey is nestled somewhere behind him just chilling out in my Studio.  I’m truly excited to play with my new creative tool must have…the only die I own is (gears) but I’m sure I can make flowers & gears look mighty purtty.  I figured whilst I was at it that I would post a couple of updated pics of how my Studio is looking nowadays. I promise to amend my post with my awesome new Buddy “Vaga” Vagabond on the Capital Steps here in Boise, ID.  Till then check out where he is sitting…(I LOVED the creative options Creative University & Creative Chemistry opened me up too!)  To leave a comment, thoughts, suggestions, or feedback - just click the title to this post & scroll to the bottom.

My Very Own “Vaga” Baby…Where In The World Is My Vagabond…sitting in my Studio waiting to be love handled with some creative goodness.  Just as soon as we get settled in were headed to the Capital of Boise, ID!:

ANewVagabond

I so did not clean up…However, I have tons of stuff that I’m going to be putting up on the Sweet Specials link soon.  It is nice to have questions like where do you create?  I hope this answers your questions & Thanks for asking:

CraftroomViewInky

CraftroomViewCloset

Tons of Paper…Mostly all re-tired CTMH Papers & Cardstocks & Stamps…

CraftroomPaperGalore

Don’t forget to enter your “Where In The World Is My Vagabond” via Sizzix Blog Thanks for Stamping By to check out Where In The World my “Vaga” is…Have an incredible week…

Monday, April 2, 2012

Creative Chemistry Journey Wrap-Up

Howdy Candies…So excited you stamped by today!  This weekend I had an opportunity to take my lil girl round the craft stores to hunt for regular clear emboss powder.  Wowza I am honestly speechless that neither the local chains nor SS have this particular goodie in stock.  (I’m loving the enameled metal technique big time) So suffice to say whilst we were out & about checking stores it just so happened that craftwarehouse was doing this $3.00 make & take using varied papers, a choice of a cool vinyl image & a paper weight.  I made one for my son so I don’t have mine completed to post so I will amend when I do (takes a bitty for things to dry).  Anyhow…I took that idea & realized I bought these 1 1/4” or so glass pieces that have a little bitty of a dome of sorts & magnets that I’ve had forever in my Studio.  It was really neat because our oldest daughter stopped in with her Fiance’ to have Sunday Family dinner & we actually sat down to create a few of these into Refrigerator Magnets.  They are so cool looking & I can’t wait till my gloss medium arrives so that I can do some additional add-ons using Tim’s ideo-logy findings line to add dimension to them.  So without further ado…PHOTOS: (To leave feedback, comments or suggestions please click on the Title to this post & scroll down)

This is what they look like drying as I did apply Glossy Accents to the back (self-leveling) to keep the glass effect continuous:

THFridgeMagnetsIndividual

Of course I enjoyed making these so much so far that I decided to post a picture collage of some of my Fav backgrounds (The first one with Butterfly I used a rub-on prior to applying the paper to the back):

THFridgeMagnetsCollage

THButterflyMagnet THBingoMagnet

THNYStreetMagnet THLabelsMagnet

THSodaPopMagnets 

Here are all the supplies you need & if you have substitutes like I did have at it & see what you create:

THFridgeMagnetsSupplies

Instructions:

1.  Make sure your punch matches the shape of your clear rock, paper weight, etc. & I used Tim Holtz “Crowded Attic” & “Paper Stash” small squares (as it maintains the image quality in a smaller size, I love these duo sided papers they certainly are great for creating altered pieces with).

2. Lightly adhere gloss modge podge or any other medium you wish to use.

3. Center your punched circle (I added walnut Distress Ink Pads with my personalized InkBloc tool that you can special order at www.stamperstorage.com around the edges) Then press to make sure you get the bubbles out…you can use a card like I did to make sure to scrap the bottom.

4.  Then put a thin layer over the top of the paper & around the edges of the paper with Modge Podge or adhesive of choice. 

5.  Take glossy accents & put a small layer (self leveling) around the back edges then draw inwards till there are no bubbles.  Then allow to set to dry approx. 24 hours to be sure.  You can place your magnet in about 2 hours into the drying time if you choose it does adhere the same or wait till it is dry to adhere your magnet with a glue gun to the back.

That’s it!  You have yourself a homemade Fridge Magnet.  I used a heavier weight of magnets & I do plan on embellishing them much more than what you see here with some ideo-logy findings. I’m giddy about this because it clears up some space that these have just decided to collect dust on for quite a while.  I would LOVE to see what you create with yours.  I will be giving away a set of 3 embellished Fridge Magnets on April 30th for those that would like to participate in our Linky Party see the end of the post & share Your Tim Holtz Fridge Magnet’s Experiments…(You can use any product you have on hand).

Today is the end of our “Creative Chemistry 101” online class…however, it is still open forum Questions for Tim until April 9th so please feel free to sign-up whenever you want to as the class is for a lifetime.  In the process of this live class ending there are so many incredibly talented people who shared along in this journey together & we have invited “Creative Chemistry 101” Graduate Students over to our online FB Group.  We would love to have you join us.  So when you have completed your course please feel free to join along on a Continued Journey with us.  (My apologies as the links to these are within the paid class forums via www.OnlineCardClasses.com & it truly is the only way to become apart of our Student Pages & Group as well as maintain the integrity of all Students, Tim Holtz & the Team at OnlineCardClasses.com).  This is the big announcement I have for today…I hope you ENJOY & feel free to participate all month long in April to the Candy Studio Linky party, of your experiment with these cool quick & easy Fridge Magnets.  Thanks for Stamping By…

To Enter Just Click to Add Your Link, Then Copy & Paste the URL address located where your photo or post is, That’s it…I’ve shared the first so you know how to participate. Thank You & Looking forward to announcing the winners April 30th. 

Tuesday, March 27, 2012

My First Tim Holtz Creative Chemistry Inspired Tag

So my girlfriend stopped over this evening & it just so happens that it’s her Husbands Birthday tomorrow…I LOVE when I get spur of the moment visits it’s such a treat to have an excuse to create, wouldn’t you agree?  The best part of it was that instantaneously I knew exactly what I wanted to make but just didn’t have the right configurations in my head,.  I mean I totally went Tim Holtz near ‘convert status’ crazy & enjoyed an indulgence of Joann’s fabric sales & had TONS of Findings to choose from.  What in the world is a girl to do?  Alas…My Girlfriend chimmed in with her own creative musings & we ended up creating an Ah-Some Birthday Tag that fit them perfectly.  I LURV the way it came out!  & Trust me it is totally “Blue China”ish in person & rocks!  Uhm…yeah let me just get to it & show ya?….Ready…Set…

FTHCandyCreation

FirstTHCandyOriginalPieceFi

This has so many meanings behind it & I only used 1 really easy technique to create the background.  “Broken China”…how many times can I say that word in one post?  (giggle)

MyFirstTHOriginalTagHorizon

Unfortunately I didn’t have a chance to get any more photos before she wisked away to enjoy an evening with her wonderful Husband the eve of his Birthday.  So Sweet!!!  I’m just tickled about the visit, the ability to create on a whim & spend quality time making something for some pretty special people in our lives.  What a way to cap off the evening of Day 7 in “Creative Chemistry 101”.  & Guess what…This is my very own 1st Tim Holtz Creatique Candy Original artwork inspired by his inspiring artistry.  Thanks for Stamping By to Share…

Sunday, March 18, 2012

12 Tags of 2012 March Tag

12tags2012

Join In With Your Rendition of March’s 12 Tags (click the photo to read & submit)

I’ve been “waiting to exhale”…wait isn’t that a movie?  I reckon the story is just in the same & totally fitting for what I want to share… I endeavored into this venture with all things Tim Holtz lately and I have to admit, I’m Addicted!  The 12 Tags of 2012 is no exception & it’s actually what started this NEW Creative Journey.  I’ve always admired the mystique that comes along with butterflies.  Truly, I’m being honest here…there is something about the transformation process that is very intriguing to me.  When applied to the current stage of finding my inner-creative ME, I would say that I’ve just opened up my cocoon and spread my wings!  Well…Here let me just show you:

Here is My 12 Tags of 2012 Tag Entry for March:

12Tagsof2012March

Here is a Close-Up of the Sentiment “Live in the moment and make it so beautiful that it will be worth remembering”:

CloseUpWording

Since I’ve only recently discovered Tim Holtz , I do not have a few of the supplies that he used in his demonstration.  Of course I’m fairly good at compensating supplies that I do have on hand & what I love the most about his philosophy, is that he encourages using them.  I won’t get into all the supplies I used but I will tell you some of them that I did in creating my very first Tim Tag.  Ready?…Distress Inks for blending the background, emboss folder to create the wood grain look, perfect medium & Distress Inks to embellish with Perfect Pearls on the woodgrain, I don’t have dies but I do have the exclusive Cricut Art Philosophy cartridge and layered 3 butterflies in various sizes ranging from 1” to 1 3/4”, Artistic wire to make the lil’ antennas, & some Distress Stains to create the ribbon.  I played so much with this wonderful tutorial that I made a couple more tags I wanted to share:

Flourish Background same lay-out alternating the Perfect Pearls “Heirloom Gold” with “Copper” & “Bronze”:

TagFlourish

The mosaic Butterflies using Tim Holtz Paper Stash paperpack (These were lots of FUN, & I’m falling in love with the Glossy Accent I must say):

Butterflies

I also used “Frayed Burlap” & “Vintage Photo” Distress Ink along with these for the backgrounds & even the backs are distress ink blended:

FadedJeansPeeledPaint

Oh Boy did I have a blast playing with the ribbon and Distress Stains!  Same method 4 different outcomes…I just folded up a piece of paper towel and dabbed randomly, then I patted the color seamless binding ribbon into the ink patches.  I love how each of them turned out:

AlteredRibbon

Alas since I was already dabbling and playing with these different ideas I decided to create a couple more in Size #5 Kraft Tags as Thank You Gifts:

DuoTags5WoodFlourish

So, when I spoke about feeling like I’ve just transformed into a butterfly and learned to spread my wings a lil’ I mean, I truly have!  I’m so inspired by his “Grunge Style” that I’m thirsting for more inspiration and knowledge about how the chemistry of his products work.  Starting tomorrow I’m taking his First ever online class “Creative Chemistry 101”!  I’m so excited about this Candies and YOU can join along with Us too, just click on the name to link up to the classroom & register, that simple.  I want to disclose that I will NOT be sharing any of the Creative Chemistry I’m learning about but I WILL be posting up photos of different projects I create outside of class material using what I’ve learned combining my other supply inventory.  So this is the BIG News I wanted to share this Sunday that just had to wait.  I hope you’ve enjoyed viewing my latest transformation of creativity and finding ME in the process.  Off into the Creatique Studio for some SMASH Sunday, Thanks for Stamping By…

Tuesday, March 13, 2012

Candy Design & Ventures To Share

My Dearest Candies, I want to thank you all for stamping by whilst I’ve been absent this last week.  Without going into to much detail the Candy Studio was on hold due to our son being in a serious car accident one week ago today.  We are happy to report that he survived with some soft tissue injuries that are currently being tended to through therapy and follow-up.  With that said I personally have experienced every Mother’s nightmare in having to deal with something so serious and life altering for our entire family.  I can only imagine the road our son has that lies ahead but we are truly blessed and thankful that our Heavenly Father has looked out for us in so many ways. 

First I wanted to send out a HUGE appreciation for the First-Responders in Middleton, ID. for their prompt and immediate attention to the scene and the way they handled the situation.  I realize that some would say that certainly that’s what First-Responders do.  However, I tend to think and reflect back at that very moment and even now, I feel they did more than what their passion is in saving lives, they helped us through a very traumatizing situation.  They were not the only ones that did so either.  I would also like to thank the Beacon Light Ward & their Members for coming out and assisting us through so many things we were dealing with at once and bringing a blessing of healing to our son.  Our Insurance company Farm Bureau for their immediate attention and response in resolving our claims and making the process easier for us to understand and get through.

I would also like to send out a Huge Thank-You to Team Mazda Subaru: Rubin, Rob, Josh, Aaron, Tasha & Rob (GM) for their tireless efforts in getting us back on our feet into another vehicle at a lower interest rate and even safer then the one we had.  In saying this…January of 2011 we did our first trade-in with this dealership to get us into our 09 Mazda5 that was completely totaled in last weeks accident.  At that time we went to them to purchase a Subaru Outback, we ended up going with the Mazda5; The safety features engaged at the time of the crash literally saved our Sons’ life as well as him wearing his seatbelt!  Within 24 hours or so that passed by, I was distraught about having transportation & the only thing I could think of at that very moment was to contact Team.  “Wonderful” Rubin listened caringly as I was crying about what happened to our family.  Within 5 minutes I received a call back from our Salesman Rob Rabb stating “I’m authorized to do whatever is necessary to help your family out and I can come pick you up.”  I can’t tell you how comforting those words sounded at the time.  What I can tell you is how much I appreciate the work they did in replacing what we lost and more.  This TEAM stayed beyond closing time to get us back on the road (so to speak).  On Saturday I received an e-mail from Rob (GM) of TEAM Mazda telling ME Thank-You!  No words can express what it feels like to experience a situation where his Team Members treated us like what had happened to us also happened to them, as they treated us like Family.  They did not sell us a car, they gave us hope!  It isn’t always about what we want in life but about what we need and every single person who worked through our process went above and beyond any experience I’ve had with a dealership ever.  I can’t say Thank You enough or show more gratitude to them for working with our family.  What I can do is share this story to all of you in hopes that if you ever find yourself in need of a vehicle I know they will go beyond the distance to help you.  With that I want to share a photo of our newest family addition Kandi: (Click on the photo to go to their web-site!)

2010SuburuOutbackLegacyPrem

There truly is many blessings that came along this last week…During my annual Creative University my Krazy Krafty Sista in Scrappin’ Crime Miss Scrappy Britches herself introduced me to Tim Holtz!  I’m so excited because I ended up getting his latest new release book signed by him:

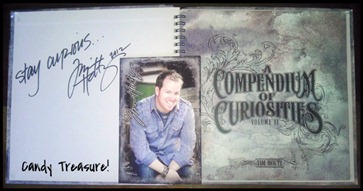
TimHoltzAutographedBookII

I can’t begin to tell you how much I’m enjoying his products and playing…so much so that WE decided to sign-up for his “Creative Chemistry 101” First ever Online Class!  I’m totally excited because this class is specific in teaching about the science of his products, to explore, inspire and enhance our own personal creative journey.  In so doing it also inspired our newest collaborative web-site & blog: www.SumKindaKrazy.com!  I sure hope you get a chance to gander as it is still under construction.  This is one of the Big announcements I asked my readers to stay tuned for during my final CU 2012 Journey post.  We would love for you to join us on this journey with Tim Holtz first ever online interactive class.  Please click on the autographed photo for the link directly to his class page for more information.  It includes a life-time access to all the PDF & Video files as well as other creative people from all over the world on top of learning so much more about his product lines and how to incorporate them into what you have on hand.  As you can tell were totally excited about this venture! 

The very same day that I got my book from Tim I received an incredible set of blending ink block tools from Stampers Storage!  My Dear Friend from InkySmiles Erin handcrafted these lovely darlings for me and I’m over the moon in love with them.  You can clearly see why & they go hand in hand with some of the technique's I will be using in our “Creative Chemistry 101” class.  Check it out:  (Click on the photo to order your very own personalized set today!)

ErinBlendingTools

Thank you all so much for stamping by and enduring so many things that have transpired this last week at the Creatique Candy Studio.  I appreciate all of your support in everything that we do.  It means the world to me.  With that I want to add that I have personally created 2 PDF documents that you can print from our newest collaborative web-site www.SumKindaKrazy.com that gives you step by step instructions on how to utilize a 12”x12” piece of Cardstock or Paper, & transform it into 3 card bases with many ideas to get Krafty from the templates are FREE as a launch of sorts for our newest site.  The intent was no waste or scrap in having this handy tutorial & drawing.  If you have any questions please do not hesitate to contact us or leave a comment on the Sum Kinda Krazy blog post.  I’m looking forward to providing even more fantabulous news this upcoming Sunday afternoon and hope that your week stays safe, happy, loving, and truly blessed!  Stay Tuned Candies…

Saturday, February 25, 2012

Creative University Journey Story Entry 2

Howdy Candies and thank you for stamping by to read more about my adventures at CU 2012!  I’m truly excited about sharing this post for a couple reasons. 1. I get to share tons of great things I learned and 2. I get to pay a humble homage and appreciation to the Ladies who touched my soul and energized my inspiration.  One of the main reasons I travel to CU every year is because of what I learn and become inspired by.  From the incredibly talented ladies in which I form true friendships, to the Awesome hand-picked by Fabulously Artsy herself - Instructors, and those that give willingly of their precious retreat free-time to show me how to endeavor into other mediums of art. 

I mean seriously…where else would I ever want to go that I can stay up till 3:30 am being creative, then take a nap by the fireplace and roll-off of it listening to a handful of Ladies crafting and giggling at my choice in sleeping quarters at 5am?  Uhm…no this isn’t the highlight of my entire weekend but just an example of how I can look back and laugh at myself because I have sooo many memories of this incredible weekend.  I think aside from all the classes and non-CU gatherings of some creative hearts that others offer to share & teach what they do in their niche but it’s the what feels like a million other things I get to experience in the process. 
I’m quite sure at this point the suspense is getting to you so let me just demonstrate what I get out of Creative University by a photo nutshell of things I did, learned, and created…Are you ready?

Creative University Classes: (In order of how my Sorority “Silver Sprites” took them)

Card Café – Sheila Bennett:

SheilaTeach

Scrapbooking – Michelle Nist:

LucyLOFullPopOutMNLucyLOMN6x6Open

Jewelry – Bird On A Wire – Erin Grotegut:

BirdOnAWireBraceletEG

Altered Art – Michelle Johns

TinFrontTinStandingInside

Technique Boutique – Self-Paced & Contributed By: Tresa Black, Sheila Bennett, Michelle Nist, Erin Grotegut, & Michelle Johns. So many different New & Old techniques learned & LOVE using them.
Technique3x3cardsTechniqueBoutique

Things that others gave so willing of their time & efforts to share & teach me how to do, my rendition of them:

Tahne Timmons – Chanmille Bracelet & Lisa Swartzenburg / Linda Shores

ChanmilleBraceletTahne

TreeNecklaceLL

I was so inspired by the Giving Tree that I made about 5 of them now. LOVE them so much that this is what I did when I came home for my Mother-In-Laws birthday gift.  Keep in mind my Darling Husband is the one that hand-picked each element that went into this gift including the stones in her necklace to installing the knob on the box. What an awesome thought he had and shows the love of his Mother.

ArleneBDayTree

ArleneBoxArleneInsideNecklaceArleneWrappedUp

Creative University Charm Swap – The theme this year was “Woodland Fairies” I’ve posted mine I did but here is what I received in return:

CU2012CharmSwapWoodlandFair

I swapped a total of 18 charms I don’t have photos of all of them but here are a couple to share:

CharmDianeKuhnCharmErinCharmLindaCharmLindaWCharmTahneCharmMollyCharmRoberta1CharmRoberta2CharmKandiCharmBobbieCharmOlgaCharmAmyCharmMelodyCharmRobinCharmTresa

I realize there are a ton of photos within this post to gander at.  I feel so blessed that I get to take home more than just one-of-a-kind treasures but I also get the chance to keep posting about my CU Journey!  I truly do not believe there are enough words or expressions of gratitude that I can give to Creative University.  What I do know is that I’m loving sharing every single moment of it with you.  If you enjoy what your reading please see my first Entry to participate in my February Blog Candy Give-Away. Stay Tuned there is more…Thanks for stamping by!

Pin It